We need to talk about... D365 CE to D365 BC Integration... Part 3
- Graeme Donnell

- Feb 3, 2023
- 3 min read
Next in my blog series on D365 CE to D365 BC Integration is a walkthrough of how we start synchronising data between D365 Sales and D365 Business Central.
Now that we have completed the initial Integration with Business Central through the Dataverse Connection Setup the next thing we need to do is to enable the D365 Sales Connection.
Within this post, you will find the standard components and some initial settings that need to be in place before deploying this integration
Create the connection with D365 Sales
To create a connection to integrate and synchronize data between Dynamics 365 CE and Dynamics 365 BC we as an initial step need to set up a connection to Dataverse.
Before you start make sure you have the below information ready with you:
The URL for the Dataverse environment that you want to connect to
The user’s name and password for an account with administrator permissions in Business Central and Dataverse.
From Assisted Setup under Connect with other systems group choose Set up a connection to Dataverse, as shown below.

From here we can search for "Sales" or scroll down the list until we find "Set up a connection to Dynamics 365 Sales"

This will start the Setup wizard, follow and provide the information asked on each page.
Click Next to Start configuring Dataverse & Business Central connection.

This is a really simple setup as it takes all the connection details and setup from your initial configuration and just enables the solution.

So now the connection to D365 Sales is enabled, we can go back to the configuration and review our settings before testing any actual data.

The main elements to check are within the Dynamics 365 Sales Settings as these control how much of the data migration between the two solutions is automated.
So I have selected to "Automatically create Sales Orders" and "Automatically Process Sales Quotes". What this means is once I created a Quote in D365 Sales it will go across to BC, and likewise for Sales Orders coming the other way.
We also have a entire new set of Table Integration Mappings to review, and we can do this via the Mappings tab.

In a real world scenario each one of these new table integrations would need review and the desired direction, filter, cadence etc agreed upon. For now we will take the out-of-the-box mappings to continue this series.
We therefore now can trigger our first synchronisation of data between D365 Sales and D365 Business Central

This will of course run automatically in the nature cadence of 30 minutes, but we can trigger a manual synchronisation by selecting "Run Full Synchronization" from the ribbon.

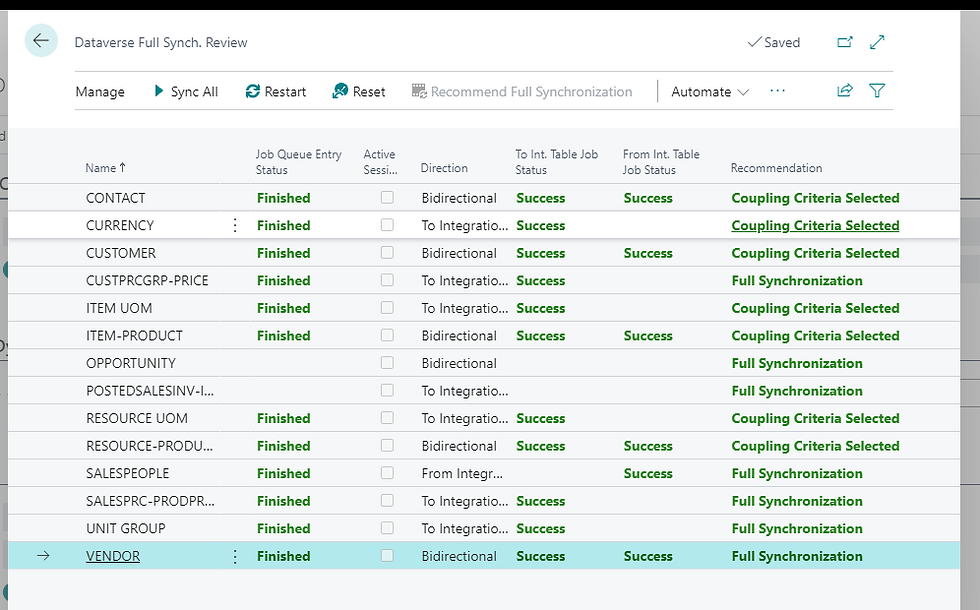
If any initial errors are discovered they will be highlighted in Red in the Status column and an error code is available. If however, you arrive at this screen and see "Select Coupling Criteria" on the right hand side, you will need to select this before running a sync again.
Below is an example of the manual coupling screen. We need to select a matching field, generally this is something unique. Also the settings at the top of this screen need configured.

Once all coupling is selected and errors resolved, we should arrive at a screen as below,

At this point we are now ready to test!
I hope you all enjoyed this post on the D365 CE integration to D365BC. I will continue this series with some additional content specifically related to how the integrations worked in more detail and how they work with other aspects of the D365 CE Suite. Take Care, and Speak Soon!


Comments